


 Now you can get the latest Java source bundled with each app update. Install the app from Google Play and go to Settings > Extras.
Create an Instant Messaging app using Google Cloud Messaging (GCM)
 Download
Keywords: Google Cloud Messaging Google Play services ContentProvider SQLiteOpenHelper BroadcastReceiver NotificationManager SimpleCursorAdapter CursorLoader ActionBar DialogFragment ListFragment ViewBinder ContentResolver PreferenceFragment Google App Engine Google Plugin JPA Servlet
Contents
- Overview
- Integrating Google Play Services
- Create an API project
- Obtain an API Key
- Create a new Eclipse Android project
- The Android Manifest file
- The Application class
- The Data Model
- The Content Provider
- GCM Utility class
- Server Utility class
- The GCM BroadcastReceiver
- Main Activity
- Add Contact DialogFragment
- Messages ListFragment
- Chat Activity
- Settings screen
- Install the Google Plugin for Eclipse
- Create new Web Application Project
- JPA model
- Servlets
- Deploy to App Engine
- Testing the app
- InstaChat
- res
- xml
- pref_notification.xml
- pref_general.xml
- pref_messaging.xml
- pref_headers.xml
- layout
- chat_list_item.xml
- activity_chat.xml
- main_list_item.xml
- drawable-hdpi
- ic_menu_share.png
- ic_menu_allfriends.png
- ic_launcher.png
- ic_menu_preferences.png
- ic_menu_edit.png
- ic_menu_invite.png
- ic_menu_delete.png
- drawable-xhdpi
- right.9.png
- ic_contact_picture.png
- left.9.png
- ic_group_picture.png
- values
- strings.xml
- strings_activity_settings.xml
- styles.xml
- drawable
- box.xml
- menu
- main.xml
- chat.xml
- xml
- src
- com
- appsrox
- instachat
- gcm
- GcmUtil.java
- Constants.java
- GcmIntentService.java
- GcmListener.java
- GcmBroadcastReceiver.java
- ServerUtilities.java
- Util.java
- DataProvider.java
- AddContactDialog.java
- MessagesFragment.java
- EditContactDialog.java
- ChatActivity.java
- CreateGroupTask.java
- MainActivity.java
- Common.java
- SettingsActivity.java
- gcm
- instachat
- appsrox
- com
- AndroidManifest.xml
- res
1. Overview
In this tutorial we show how to use Google Cloud Messaging (GCM) to create an instant messaging app like WhatsApp or Facebook Messenger. Google Cloud Messaging for Android (GCM) is a free service provided by Google that allows sending data to an Android-powered device, and also to receive messages from the device.
Note: This tutorial is deprecated. Instead, please check out Firebase based chat app project on Github. Also, for video and voice calling functionality you may refer the WebRTC based project.
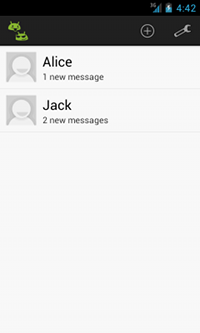
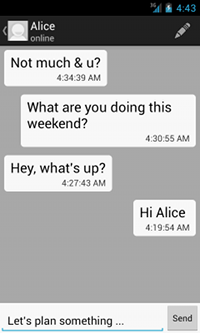
An instant messaging app like this can be implemented using push notification mechanism provided by GCM where server sends messages to a device so that it need not poll the server continously for messages which drains battery power.
We use the latest GoogleCloudMessaging APIs that comes with Google Play services instead of the deprecated GCM helper libraries. So to test the app you'll need a real device having Google Play Store application installed, or an emulator with Google APIs running latest version of Android.
GCM requires a server-side implementation in addition to the client implementation in the app. The client ie. the app, actually posts messages to your server which in turn sends data to the GCM server that is responsible for delivering the message to a specific Android device. You may want to read the official docs on GCM architecture.We'll use Servlets and JPA to implement the server and use free quota provided by Google App Engine (GAE) to power our server.
There are several steps that need to be done before we could use GCM in our application. First of all is installing the Google Play services SDK. If you haven't done it already, you may want to visit our earlier tutorial on setting up the development environment.
2. Integrating Google Play Services
The Google Play services SDK gets installed at the following location in the Android SDK directory.<android-sdk-folder>/extras/google/google_play_services/To use the client library you need to import google-play-services_lib project into your Eclipse workspace. For this go to File > Import. Then, select Android > Existing Android Code into Workspace. Click Next.
In the Import Projects dialog, browse to the following directory and specify it as the Root Directory.
<android-sdk-folder>/extras/google/google_play_services/libproject
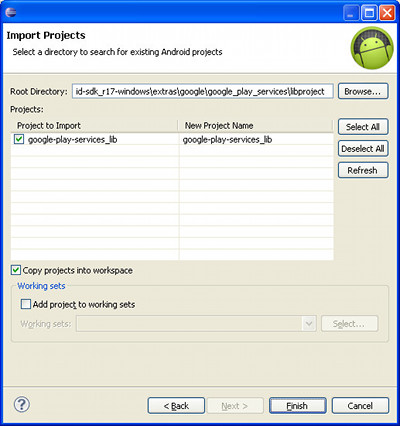 Select google-play-services_lib and Copy projects into workspace. Click Finish. A copy of the library project will get imported into your workspace.
3. Create an API project
In order to obtain an API key you need to first create an API project through the Google APIs Console.If you log in to the console for the first time then you'd be prompted to create a project.
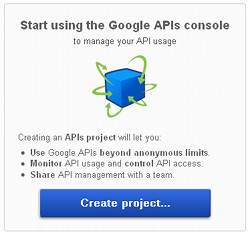 Click Create project. You'll then see the Dashboard for the API project. It's a good idea to create a new project for GCM.
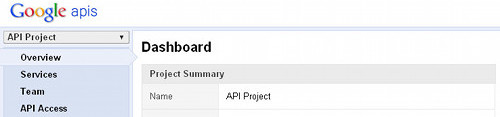 Click on the project drop-down on the left side panel. Click Create... and enter a name for the project then click Create project. The project will be created and the Dashboard will refresh to reflect the current project.
Note down the Project Number displayed in the Dashboard Project Summary section. This number is also visible in the browser URL something like:
https://code.google.com/apis/console/#project:4815162342The project number (for eg. 4815162342) will be used later as the GCM sender ID.
4. Obtain an API Key
Next, click on Services on the left side panel to see all services provided by Google.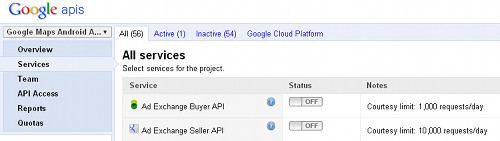 Find Google Cloud Messaging for Android and click on the switch to activate the service.
 Next, click on API Access on the left side panel to open the API Access page.
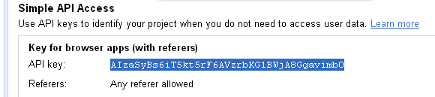 Copy the API key as it will be used later, and you may log out of the console.
5. Create a new Eclipse Android project
In Eclipse, go to File > New > Project and in the New Project dialog, expand Android folder to select Android Project.In New Android Project dialog enter the project details as follows.
Application Name: Insta Chat
Project Name: InstaChat
Package Name: com.appsrox.instachat
Minimum Required SDK: API 15
Compile With: API 15
Accept the defaults and click Next, Next, Next, Finish. The project gets created in your workspace.
Next we need to add google-play-services_lib project as a library to our project. Right click on the project and go to Properties > Android.
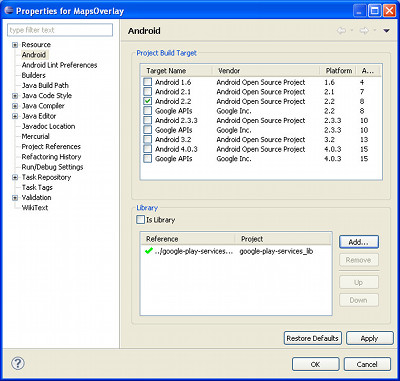 In the Library section, click Add and then select google-play-services_lib and click OK. This will add google-play-services_lib as a library to the project so we can now use GoogleCloudMessaging API.