Now you can get the latest Java source bundled with each app update. Install the app from Google Play and go to Settings > Extras.
Create an Instant Messaging app using Google Cloud Messaging (GCM)
 Download
Keywords: Google Cloud Messaging Google Play services ContentProvider SQLiteOpenHelper BroadcastReceiver NotificationManager SimpleCursorAdapter CursorLoader ActionBar DialogFragment ListFragment ViewBinder ContentResolver PreferenceFragment Google App Engine Google Plugin JPA Servlet
Contents
- Overview
- Integrating Google Play Services
- Create an API project
- Obtain an API Key
- Create a new Eclipse Android project
- The Android Manifest file
- The Application class
- The Data Model
- The Content Provider
- GCM Utility class
- Server Utility class
- The GCM BroadcastReceiver
- Main Activity
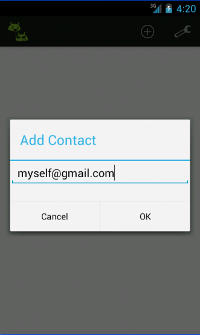
- Add Contact DialogFragment
- Messages ListFragment
- Chat Activity
- Settings screen
- Install the Google Plugin for Eclipse
- Create new Web Application Project
- JPA model
- Servlets
- Deploy to App Engine
- Testing the app
18. Install the Google Plugin for Eclipse
The Google Plugin for Eclipse allows you to easily create and deploy Google App Engine (GAE) applications. It can be installed from an update site just like any other Eclipse plugin.In Eclipse, select Help > Install New Software... to open up Install dialog. Click Add... button. Enter an update site in the Location field specific to your Eclipse version. You can get the details here. Click OK. The Install dialog will refresh to display a list of available software.
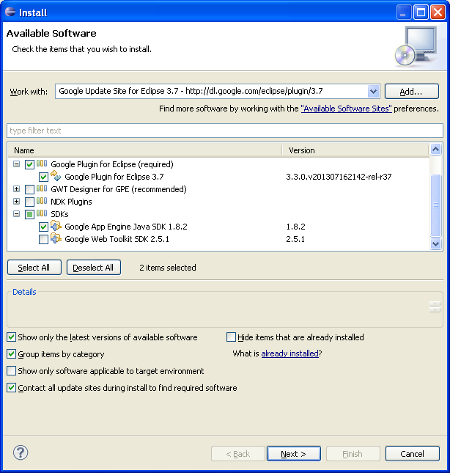 Select Google Plugin for Eclipse and App Engine Java SDK as shown above. Click Next, Next, Accept and Finish. Restart Eclipse when prompted.
19. Create new Web Application Project
Post restart you will find a new icon in Eclipse toolbar. You can learn more about the plugin here. Click on it and select New Web Application Project.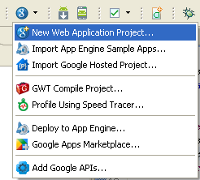 In New Web Application Project wizard enter,
Project name: Demo Server
Package: com.appsrox.messenger.server
and uncheck Use Google Web Toolkit. Click Finish. The project will get created in the workspace with sample code.
Next put gcm-server.jar and json_simple-x.x.jar in the war/WEB-INF/lib directory of the project. Also add gcm-server.jar to the build path of the project. You can get these JARs from Google Code.
20. JPA model
The App Engine Java SDK includes an implementation of JPA for the App Engine datastore. The necessary JARs and configuration file (persistence.xml) are already added to the project by the new project wizard. You can read more about using JPA with App Engine from the official docs.Let's create an entity corresponding to a contact in the datastore.
	@Entity
	public class Contact {

		@Id
		@GeneratedValue(strategy = GenerationType.IDENTITY)
		private Long id;
		private String email;
		private String regId;

		public Contact() {}

		public Contact(String email, String regId) {
			this.email = email;
			this.regId = regId;
		}

		public static Contact find(String email, EntityManager em) {
			Query q = em.createQuery("select c from Contact c where c.email = :email");
			q.setParameter("email", email);
			List<Contact> result = q.getResultList();

			if (!result.isEmpty()) {
				return result.get(0);
			}
			return null;
		}

		//getters and setters for fields
	}
EntityManager is used to interact with JPA and we get an instance of it from the EntityManagerFactory class. It's a good practice to cache an EntityManagerFactory instance as it takes time to initialize.
	public class EMFService {
		private static final EntityManagerFactory emfInstance = Persistence.createEntityManagerFactory("transactions-optional");

		private EMFService() {
		}

		public static EntityManagerFactory get() {
			return emfInstance;
		}
	}
21. Servlets
Next create Servlets corresponding to each POST request sent by the Android app i.e. register,
	@SuppressWarnings("serial")
	public class RegisterServlet extends HttpServlet {

		//private static final Logger logger = Logger.getLogger(RegisterServlet.class.getCanonicalName());

		@Override
		protected void doPost(HttpServletRequest req, HttpServletResponse resp) throws ServletException, IOException {
			String email = req.getParameter(Constants.FROM);
			String regId = req.getParameter(Constants.REG_ID);

			EntityManager em = EMFService.get().createEntityManager();
			try {
				Contact contact = Contact.find(email, em);
				if (contact == null) {
					contact = new Contact(email, regId);
				} else {
					contact.setRegId(regId);
				}
				em.persist(contact);
				//logger.log(Level.WARNING, "Registered: " + contact.getId());
			} finally {
				em.close();
			}
		}
	}
unregister,
	@SuppressWarnings("serial")
	public class UnregisterServlet extends HttpServlet {

		//private static final Logger logger = Logger.getLogger(UnregisterServlet.class.getCanonicalName());

		@Override
		protected void doPost(HttpServletRequest req, HttpServletResponse resp) throws ServletException, IOException {
			String email = req.getParameter(Constants.FROM);

			EntityManager em = EMFService.get().createEntityManager();
			try {
				Contact contact = Contact.find(email, em);
				if (contact != null) {
					em.remove(contact);
					//logger.log(Level.WARNING, "Unregistered: " + contact.getId());
				}
			} finally {
				em.close();
			}
		}
	}
and send.
	@SuppressWarnings("serial")
	public class SendServlet extends HttpServlet {

		//private static final Logger logger = Logger.getLogger(SendServlet.class.getCanonicalName());

		@Override
		protected void doPost(HttpServletRequest req, HttpServletResponse resp) throws ServletException, IOException {
			String msg = req.getParameter(Constants.MSG);
			String from = req.getParameter(Constants.FROM);
			String to = req.getParameter(Constants.TO);

			Contact contact = null;
			EntityManager em = EMFService.get().createEntityManager();
			try {
				contact = Contact.find(to, em);
				if (contact == null) return;
			} finally {
				em.close();
			}

			String regId = contact.getRegId();
			Sender sender = new Sender(Constants.API_KEY);
			Message message = new Message.Builder()
	//			.delayWhileIdle(true)
				.addData(Constants.TO, to).addData(Constants.FROM, from).addData(Constants.MSG, msg)
				.build();

			try {
				Result result = sender.send(message, regId, 5);
	/*			List<String> regIds = new ArrayList<String>();
				regIds.add(regId);
				MulticastResult result = sender.send(message, regIds, 5);*/

				//logger.log(Level.WARNING, "Result: " + result.toString());
			} catch (IOException e) {
				//logger.log(Level.SEVERE, e.getMessage());
			}
		}
	}
The actual code to send a message to GCM is contained in Sender class that comes from gcm-server.jar. Its source code is available with the Google Code project you checked out earlier.
You can send a message to multiple recipients in case of group chat by passing a list of registration IDs.
Finally, declare the servlet mappings in web.xml present inside war/WEB-INF directory of the project.<servlet> <servlet-name>Register</servlet-name> <servlet-class>com.appsrox.messenger.server.RegisterServlet</servlet-class> </servlet> <servlet-mapping> <servlet-name>Register</servlet-name> <url-pattern>/register</url-pattern> </servlet-mapping> <servlet> <servlet-name>Unregister</servlet-name> <servlet-class>com.appsrox.messenger.server.UnregisterServlet</servlet-class> </servlet> <servlet-mapping> <servlet-name>Unregister</servlet-name> <url-pattern>/unregister</url-pattern> </servlet-mapping> <servlet> <servlet-name>Send</servlet-name> <servlet-class>com.appsrox.messenger.server.SendServlet</servlet-class> </servlet> <servlet-mapping> <servlet-name>Send</servlet-name> <url-pattern>/send</url-pattern> </servlet-mapping>
You can get the complete project from here.
There is one thing missing and that is the API_KEY required to send messages to the GCM server. Create a Constants file and provide the API_KEY obtained earlier.
	public interface Constants {

		/**
		 * Google API Console Browser key.
		 */
		String API_KEY = "<provide_api_key>";

		String FROM = "email";
		String REG_ID = "regId";
		String MSG = "msg";
		String TO = "email2";
	}
Now the server application is ready to run. Right click on the project and select Run As > Web Application. The application should be running on your local machine at http://localhost:8888/
However, it's not yet accessible to the world.
22. Deploy to App Engine
First, log in to GAE Admin Console and create a new application. You'll have to provide an 'Application Identifier' for the application that you must check for availability. Enter 'Application Title' as well and click Create Application.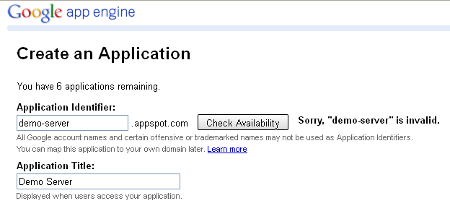 Once you register an application ID with App Engine you can deploy the app directly from Eclipse. Click on the Google plugin icon in Eclipse toolbar and select Deploy to App Engine... You'd be prompted to login. Use the same account to log in which you used in GAE Admin Console and click Accept.
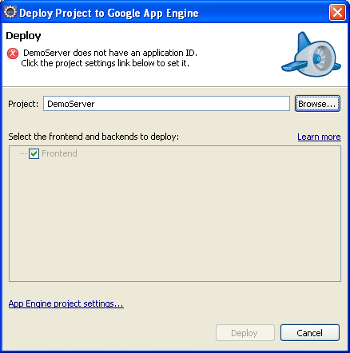
Launch the Deploy to App Engine dialog again. Next you have to provide the application ID by clicking the App Engine project settings link at the bottom.
 Finally, click Deploy. The demo server application should become accessible at http://<provide_app_id>.appspot.com/
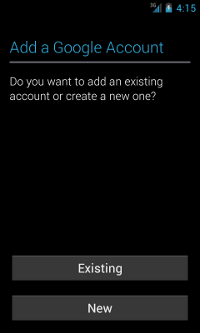
23. Testing the app
Now that the server is ready, go ahead and update the SERVER_URL in Constants.java in the Android project. You can update this value in the Settings screen as well.We suggest you test the app on a real device since messages are not usually delivered instantly by GCM on the emulator. However, if you use emulator then ensure that you create an AVD with Google APIs (latest API level) and add a Google Account.