Build your first pro Android application with Eclipse
 Download
Keywords: AppCompat Fragment ActionBar ViewPager Navigation Drawer LoaderManager SQLiteDatabase CursorLoader SimpleCursorAdapter ContentProvider SQLiteOpenHelper ContentResolver ListFragment ListView GridView DialogFragment Volley Library RequestQueue ImageLoader NetworkImageView
Contents

- Overview
- Create a new Eclipse Android project
- Add Android Support library
- Android manifest
- Application theme
- Application class
- Splash screen
- Login screen
- Help screen
- Settings screen
- Navigation Drawer
- Main screen
- Dialog Fragment
- Content Provider
- Data model
- List Fragment
- Data Adapter
- Grid View
- View Pager
- Detail screen
- Volley Library
- What's next?
10 « Prev Page
21. Volley Library
Volley library makes executing asynchronous network calls, loading multiple images in the background, and response caching simpler. Google describes it as a library that makes networking for Android apps easier and faster.We'll first see how to download and setup the library to use it in our project. The library project code is available at https://android.googlesource.com/platform/frameworks/volley/
If you don't want the latest code from Git, you can directly put volley.jar in libs folder of your project.
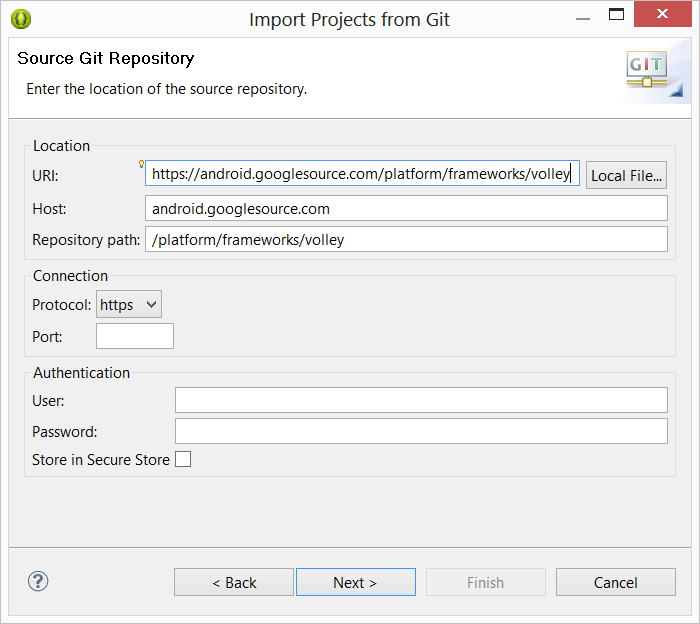
You can import the Git project using Eclipse Import wizard. Go to File > Import. Select Projects from Git under Git and click Next. Select URI and click Next. In URI field enterhttps://android.googlesource.com/platform/frameworks/volley
 Host and Repository path will get populated automatically. Click Next. Select only master branch and click Next. Specify directory of your choice to download the project. Click Next, Next, and Finish.
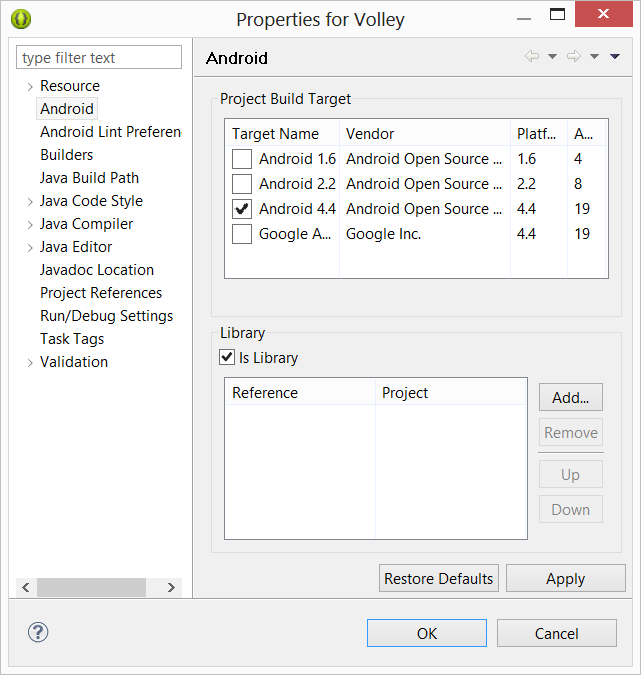
Volley project should get imported into workspace. Right click on Volley project to open Properties dialog and select Android. Check Is Library option as shown in screenshot below.
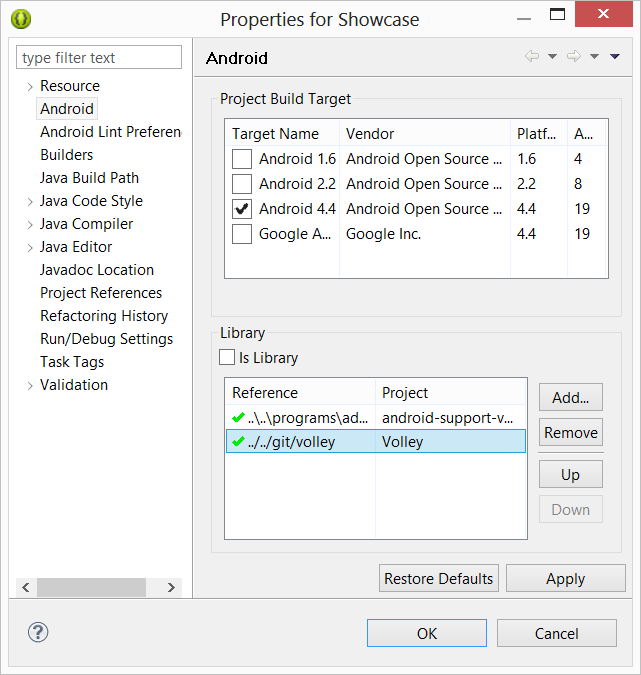
 We can now create a dependency on Volley library project from our application project i.e. Showcase.
 Now that the setup is ready (either by including volley.jar or by adding Volley library project), we'll next see how to use RequestQueue and ImageLoader classes of Volley to simplify networking code.
First, modify the Application class as follows.
	public class App extends Application {

		private static App sInstance;
		private RequestQueue mRequestQueue;
		private ImageLoader mImageLoader;

		public static App getInstance(){
			return sInstance;
		}

		@Override
		public void onCreate() {
			super.onCreate();
			sInstance = this;

			mRequestQueue = Volley.newRequestQueue(this);
			mImageLoader = new ImageLoader(this.mRequestQueue, new ImageLoader.ImageCache() {

				private final LruCache<String, Bitmap> mCache = new LruCache<String, Bitmap>(10);

				public void putBitmap(String url, Bitmap bitmap) {
					mCache.put(url, bitmap);
				}

				public Bitmap getBitmap(String url) {
					return mCache.get(url);
				}
			});
		}

		public RequestQueue getRequestQueue(){
			return mRequestQueue;
		}

		public ImageLoader getImageLoader(){
			return mImageLoader;
		}

	}
It's a good idea to use a singleton Application instance so that all requests are queued to a single queue.
Make sure android.permission.INTERNET is added to the manifest.
	private void populate() {
		JsonArrayRequest req = new JsonArrayRequest("http://www.appsrox.com/apps/", new Response.Listener<JSONArray> () {
		    @Override
		    public void onResponse(JSONArray response) {
		    	ContentResolver cr = getContentResolver();
		        try {
		        	int size = response.length();
		        	for (int i=0; i<size; i++) {
		        		JSONObject json = response.getJSONObject(i);
		        		ContentValues cv = new ContentValues(1);
		        		cv.put(DataProvider.COL_CONTENT, json.toString());
		        		cr.insert(DataProvider.CONTENT_URI_DATA, cv);
		        	}
		        } catch (JSONException e) {
		        }
		    }
		}, new Response.ErrorListener() {
		    @Override
		    public void onErrorResponse(VolleyError error) {
		    }
		});

		// add the request object to the queue to be executed
		App.getInstance().getRequestQueue().add(req);
	}
The code is self-explanatory. Notice that with few lines of code we can achieve what otherwise would require HttpClient/HttpURLConnection and AsyncTask.
Finally, modify onCreate() method in MainActivity to invoke populate().
	@Override
	protected void onCreate(Bundle savedInstanceState) {
		super.onCreate(savedInstanceState);
//		setContentView(R.layout.activity_main);

		prefs = getPreferences(Context.MODE_PRIVATE);
		if (prefs.getBoolean("firstLaunch", true)) {
			prefs.edit().putBoolean("firstLaunch", false).commit();
			startActivity(new Intent(getApplicationContext(), HelpActivity.class));

			//dummy content
			populate();
		}
	}
Another use of Volley library in our application is to asynchronously load image from web url and display it on screen.
Volley library makes it easy by providing a specialized NetworkImageView in place of standard ImageView.
	<com.android.volley.toolbox.NetworkImageView
		android:id="@+id/imageView1"
		android:layout_width="48dp"
		android:layout_height="48dp" />
Here is how to set the web image url in DataAdapter previously.
	NetworkImageView iconView = (NetworkImageView) view.findViewById(R.id.imageView1);
	iconView.setDefaultImageResId(R.drawable.ic_launcher);
	iconView.setImageUrl(iconUrl, App.getInstance().getImageLoader());
There is a lot more you can do with Volley library.
22. What's next?
We hope you've learned something new from this tutorial. Although the app we developed is not really ground breaking but you may want to check out our tutorials on few other apps that are more useful.More Stuff » 10


 Now you can get the latest Java source bundled with each app update. Install the app from Google Play and go to Settings > Extras.